Search the Community
Showing results for tags 'Skyrim'.
-
-

-
-
-

Trinity Restored Karliah Glitch
True to Caesar posted a topic in Unofficial Skyrim Special Edition Patch
Whenever I attempt to complete "Trinity Restored" in the Thieves Guild quest line, after Karliah gives us our outfits and talks to the group she walks towards the gate and then turns around and walks all the way back to the Ragged Flagon is there any way that this could be added to the ussep patch or in any other patch mod. Thank you! -
Long ago, during the second era in the time of the Planemeld, adventurers sought out whatever power they could gain to aid in their battle against Molag Bal. Among these items of power were Skyshards, presumably made available by the gods for those who were dedicated to exploring both the hidden and mundane corners of Tamriel. Not much is truly known about them, but in these trying times of dragons and civil war, the Skyshards have once again appeared for the Last Dragonborn to discover and augment his power. ESO Skyshards places several shards throughout the province of Skyrim, including Dawnguard areas and Solstheim. Much like the ones from ESO itself, once you collect 3, you will earn 1 perk point to spend as you see fit. There are 6 in each section, for a total of 66 shards amounting to 22 extra perk points. That may seem like a lot, but by the time you've found them all you'll likely be pretty high level anyway so it balances out in the end. Sorry, beyond the 3 screenshots displayed for the mod, I will not reveal the locations of all of the shards. They do not have map markers either, and there are no plans to provide any. They are located in a mix of easy areas and hard areas so they should prove to be quite a challenge to locate. This mod will go especially well with mods that expand the number of perks you can use as well as perk overhauls that expand the number of points required to obtain perks. Downloads AFK Mods TES Alliance Installation Requirements Official Skyrim patch 1.9.32.0.8 or greater. DO NOT extract the contents of the BSA file into your Data folder as loose files, or let your mod manager perform an equivalent function on the contents of the file. Doing so will cause things to load in the wrong order and break the game. Skyrim is intended to load a BSA alongside it's ESM/ESP file. Circumventing this causes issues which I will not provide support for. If you insist on going against this advice, you will receive no support for the problems you generate as a result of this. Installation - Wrye Bash BAIN Drop the archive into your Skyrim Mods\Bash Installers folder, then install as usual. Make sure the mod is active in the Wrye Bash mods tab. Installation - Manual Drop the Skyshards.esp and Skyshards.bsa files into your Data folder. Activate the mod using whatever management tool suits you. Uninstalling Due to the nature of Skyrim mods, especially those adding scripts, it is strongly discouraged to attempt uninstalling a mod from your active game. Any mod that is more than pure mesh or texture replacements has the possibility to leave behind permanent changes to your save that you may not want. This is not something modders can correct for. It is how the game was designed by Bethesda. No support will be provided for anyone who uninstalls this mod from an active game and continues on with that save. To remove the mod: Delete the Skyshards.esp and Skyshards.bsa from your Data folder. Then reload your game as usual. Load Order LOOT should be used for optimal placement. Credits MadCat221: Mesh and texture assets provided for the Skyshards. JayCrane: Static collision for the model since the Havok variety would not have worked. Disclaimer This mod is not made, guaranteed, or supported by Microsoft, Zenimax, Bethesda Game Studios, or any of their affiliates.
-
this post is a year old but it really got me thinking about SE retex potential. i have tried poking around on google, steam, nexuswiki, actual wikipedia... i'm having a hard time getting any hard technical details about the SE engine. i even popped in to ask the experts, but i suspect they are busy with holidays. at school all of the shaders we make are geared for pre-render, not live render so words like brdf, fresnel, gloss, smoothness, and anisotropy are familiar now. UE4 already supports using physics based rendering shaders and i'm really curious how much of that we can implement in SE. i asked on chatty and the SE engine treats normal maps as bump maps which just means ignoring the colour information so it's a greyscale map? i know that UE4 [and therefore the bears] can support displacement maps, but i'm wondering if the upgrade to the SE engine means allows that too.
-
Hello, I am a PC user of Skyrim that has been using mods for quite some time. This however does not concern me directly. I have a friend who recently purchased the Special Edition on Xbox One to play with mods. The issue is with the Dark Brotherhood quest "Mourning Never Comes" wherein it tells hi mto talk to Muiri (for the second time) after she tells him to kill some people. It says she is in Markarth but the quest marker puts her far into the ocean past the mountains to the north on the map. He has walked around in Markarth for hours looking for her but it seems like the game genuinely dropped her in the ocean. He is using -USSEP -Relationship Dialogue Overhaul -Adventurer's Chest -Populated Forts/ Towers As I said I have been using mods for Skyrim and Bethesda in general and it seems like it couldn't be an issue with the mods he is using. I am reporting this with hopes that either you would be able to replicate and find a fix, or tell me a solution. Either way your mod said to report special edition bugs so here I am. Much thanks
-
 Hi! I'm working on the bugs in SureAI's Enderal, and here's one that's beyond my grasp (as well as that of the rest of team). Maybe anyone here wants to take a chance at it, or just knows the issue from their experience? There is a certain NPC, called "Novizin Elia" (ID _00E_NQ28_NoviceElia), who hangs around the graveyard of Ark kneeling at a grave, until one talks to her and does her quest (NQ32). (Yeah, the NQ numbers don't match, for historical reasons. Oops.) As I approach her, she is kneeling: https://www.dropbox.com/s/k1h67b301a2c10w/nq32desc-001.jpg?dl=0 . Meanwhile, a triggerbox I've entered has set the stage of NQ32 to 5; this is to ensure that her dialogue has any chance to start. Now I talk to her: https://www.dropbox.com/s/aqdk7nt2racsfar/nq32desc-002.jpg?dl=0 . Her greeting, "(Schluchzen)" ("(sighs)") is actually not from NQ32, but from a different quest (ArkGenericDialogue), because it's an Idle and we want it to happen even before the player enters the triggerbox. Here's it in the CK: https://www.dropbox.com/s/8ibq3fqk5fs2mwx/nq32desc-003.png?dl=0 . It has a Papyrus fragment attached to its End: If NQ28.GetStage() < 5 NQ28.SetStage(5) NQ28.SetObjectiveDisplayed(7) Endif (the NQ28 property is set to NQ32, don't wonder). But since NQ28.GetStage() is already 5, this should do nothing. And don't worry about this script too much; if I remove it, the bug persists. However, the "Alles in Ordnung?" topic is actually from quest NQ32: https://www.dropbox.com/s/mym07oouq1anyok/nq32desc-004.png?dl=0 . For all I know, the conditions are satisfied (the stage is 5, the alias is set). Nevertheless, (ingame) I click on the topic and nothing happens! The "(Schluchzen)" stays. (And this is happening to many players, not just me.) Clicking again doesn't help either; nor does tabbing out and talking to her again immediately afterwards. The only thing that does help is wandering around for a few minutes and returning to Elia again; at some point the topic just randomly starts working. This is a Heisenbug; it sometimes just doesn't happen. Yet it appears to happen about 2 in 3 attempts. We have a few other occasionally unclickable topics in other quests, which we suspect to be of similar origin, but which are harder to reproduce. Anyone a guess? Could it really be the script fragment, somehow persisting through its removal? Could it be the "Random" flag on the Idle greeting? Does her kneeling AI prevent her from talking properly? Could the voice for "(Schluchzen)" be somehow messed up? Have you seen anything like this? (Note: I've been told that "start game enabled" quests have some issues with dialogue; but NQ32 isn't such a quest.)
 -

How to make GND/GO models for Skyrim (Blender 2.77a) [Meshes Part 1/2]
majormodder posted a topic in Knowledge Base
For a long time I was forced to look at the inventory models of skyrim and the many armor mods that have come out since then, but most armor mods dont come with their own GND models, but rather copies of those found in vanilla skyrim. So for the longest of times most of us had to accept the laziness of modders and bethesda, but not any more (for the most part). This tutorial will cover the conversion of a "skinned" model, or a model that is rigged to a skeleton, into a GND/GO nif. (Collision mesh is in another tutorial) Q: What is a GND/GO nif and what does it do? A: The GrouND/ Ground Object is the model that the player sees when viewing an item in their inventory or when dropped onto the ground such as food, clutter, potions, weapons etc, etc. TOOLS NEEDED: The latest Blender, or Blender 2.77a as that is what i'm using right now for this tutorial, you heard me right, we wont be using 2.49b anymore! LINK Nifskope 2.0, or 1.2.0 Alpha 2 LINK Nif importer/exporter dev plugin v4, download here just in case you cant find the latest version on the nifskope forums LINK Nif importer/exporter dev plugin v5, 20 June 2016 LINK Possibly GIMP 2.0 in case you want to manually edit textures LINK A BSA extractor tool, go search online for one, there are many, I will be using B.A.E. LINK Preparation: If you haven't already done so, extract your archives since this tutorial is going to be using the bethesda GND nifs as a form template, but more importantly their collision shapes are what we are needing since this tutorial utilizes. Disclaimer! This tutorial is meant to teach you how to convert a RIGGED MESH into a GND nif, or even tweak a GND nif as there really isnt a reason to convert other objects into GND nifs, and as it stands the nif plugin for blender is not entirely functional and is still in development, which means that the collision export is bugged, so you may have to play around with your export/import options and even your file afterwards in nifskope, collisions are to be covered in a later tutorial. Make back-up copies just in case your custom GNDs cause your game to crash, and make sure you have done everything with your knowledge to troubleshoot issues that could be caused by you and not the plugin/blender. This plugin can actually be used to make/edit armor and export just fine for the most part, but you may run into the vertex->weight issue, and I may release another tutorial covering that as well. I also assume that you know how to operate blender, as this tutorial teaches you how to convert a nif and not use blender itself. If you dont know much about operating blender or what i am doing in blender, please go watch some tutorials on creating things in blender on youtube as they are a great way for a person to learn and get used to the layout since 2.49b is vastly different from 2.77a. STEP 1) Download and install blender 2.77a, nifskope, and then install the dev plugin by File>User Preferences>Add-Ons>Install From File. STEP 2) Import your nif file(s) into blender, if you are going to use my method of converting a mesh and then replacing a bethesda nif that already comes with a working collision layer, I suggest you choose something from your extracted archive that would fit the mesh you are currently converting. Sidenote: Unless you have a custom default scene that is empty, make sure you have first cleared your scene by pressing A twice and then press the delete button when your cursor is in the 3d render window, and hit enter or click on the option that asks for you to delete. STEP 3) Link your textures in the material section, and that means all of them that blender asks you to, otherwise blender wont let you export your mesh. Sidenote: Click and hold your mouse wheel while your cursor is over the Properties Bar and scroll to the left in order to get to the materials and textures tabs. Your textures may not be automatically linked by blender even if all of your meshes are in the extracted archive which is why they appear to be black, so you will have to link them yourself, make sure your Viewport Display in your 3D view is set to Texture or Material in order to prevent confusion of whether or not your textures have been linked by blender. Make sure that you have linked the Diffuse and Normal maps, and any other "maps" blender recognizes a texture link to. Find the textures that your model needs, such as the diffuse and normal maps, and link them, they should appear automatically if you have set your display settings accordingly. WARNING SOME TEXTURE LINK DATA MAY BE LOST SUCH AS ENVIRONMENT MAPS BUT CAN BE RESTORED FULLY IN NIFSKOPE SO DON'T SWEAT IT IF IT DOESN'T KEEP THE TEXTURE DATA! STEP 4) Import your reference GND nif, and then repeat step 3 STEP 5) Align your rigged mesh to the reference GND, use the pose mode from the skeleton, rather than manually moving the vertices to save time and keep the ability to further manipulate and move around the mesh without having to manually edit the vertices. STEP 6) After you are satisfied with the posed position of your rigged mesh, apply the armature modifier to set the pose of the model. STEP 7) Delete all vertex groups after you have applied the armature modifier, or else your mesh will go back to its default T-pose state STEP 8) Delete the reference GND vertices, but do not delete the entire node, you will need that unless you want to go through the trouble of altering the new mesh's data to be exported as a GND object, instead of a skinned one. STEP 9) Merge the new mesh to the empty reference node, do this in object mode and use Ctrl+J, DO NOT MERGE THE EMPTY NODE TO THE NEW MESH OR IT WILL NOT WORK. STEP 10) Go back to your materials and delete the old material data, so that only your new mesh's material data exists. STEP 11) In object mode, select your mesh and collision layer, however since the blender plugin doesn't fully support collision export, you can delete it if you want to, but you can keep it if you want to generate an entirely new collision shape in Nifskope later on. STEP 12) Export your selection by going to File>Export>NetImmerse/Gamebryo (.nif), make sure your export selection is set to Skyrim, the default for the plugin is for Oblivion, you may get an error message that says your version number does not match the selected export option, which means you did not set your file version correctly, or you did not set your export version to Skyrim. You aren't exporting a rigged mesh, so don't change any of the settings anywhere else, just make sure your export game setting is set to Skyrim. STEP 13) Name and export your file whatever you wish, just be warned that your nif's exported name, will be the same name as your BSFadeNode, in other words if you export your nif as Scene Root.nif, the name value of the nif will be Scene Root. STEP 14) Open up your new GND nif, and open up your reference GND nif, you are going to remove the mesh of the reference GND and copy/paste in your own, that way you can keep the old collision data without having to generate a new collision mesh. Delete the reference mesh by right clicking on it in the display window, and click on Block>Remove Branch. STEP 15) Now go into your new GND nif and do the same, except copy your mesh for the reference by right clicking on your mesh in the 3d render window, and clicking on Block>Copy Branch. STEP 16) Paste your new mesh into the reference by right clicking on the BSFadeNode name, and clicking on Block>Paste Branch. Sidenote: Make sure you right click somewhere in the value of the name, for example from the Txt to the [0], otherwise Nifskope may end up pasting your mesh outside of the node, which would be bad news for you because the nif may not save and will not work and may cause your game to crash. STEP 17) Your new mesh may not have the same string name, as it so happens, all pasted data will assume the name of a pre-existing string name, so you must rename your string, I suggest the name of the mesh that was already deleted. If you want to give it a custom name, just remember that nifskope will literally make a new string name for each new letter or symbol entered into the table, which can lead to a stair-step string name list effect, it wont harm the nif, but it makes you look sloppy in your editing, go ahead and look at some old Skyrim armor mods, you may find some unused or old string names such as Material.001 for example. My node's name was assumed to be BSX, just click on whatever the deleted node's string name was, mine was helmet01:0, then press okay. STEP 18) Save your new nif as something other than the reference nif and your exported nif. STEP 19) If your nif file had more than two texture references other than the diffuse and normal, you will have to manually repath them in Nifskope. Expand the node by right clicking on the arrow to reveal the data within the node, expand NiTriShape>BSLightingShaderProperty and then select BSShaderTextureSet, then expand the textures menu in your block details, it should look like my reference image and you should see your two dds textures linked, and if you want to manually relink or change textures, just right click on the texture path and click choose, a menu should pop up and you will have to select the textures you want. Make sure you reduce your texture path by double clicking on the texture path, and deleting any text that comes before "textures\.......", as it may cause odd rendering issues as the game will be looking for textures that the user may not have, or the directory of the player using your mod may not be the same as yours is, which is why you should always reduce your linked texture paths. STEP 20) You are now done with your GND nif, if you are replacing a pre-existing nif, such as I am, I can copy and paste and rename the helmet nif accordingly in the right file location, use your extracted archive for reference. If you are wanting to make an entirely new GND nif for a custom armor, then you will have to put it where your armor is, make sure the file is named properly such as Helmet_GND.nif. If you are making an entirely new GND nif and want it in your game, you will have to manually link it in the Creation Kit, but there are tutorials elsewhere for stuff like that, as this tutorial was strictly meant to help you create a GND nif, not make a mod that uses it. Here is an example of the old GND nif that was low-poly, and here is the new nif that uses the same model that you wear. OLD version DOWNLOAD NEW higher-poly version DOWNLOAD If you think that this tutorial/method doesn't work, then please take a look at what I have made below by using this method. -
Here's a pre-built archive containing all ressources files required to build terrains, objects and trees LOD for Skyrim, Dawnguard and Dragonborn from within the CK and Oscape. The included readme file already has all the useful informations about that, so nothing more here. -Terrains LOD : Tested for Skyrim and Solstheim - No issue -Objects LOD : Tested for all worldspaces from Skyrim, Dawnguard and Dragonborn - No issue -Trees LOD : Not tested This archive is meant to make your life easier in these tasks. It contains about 100 fixed meshes, but it may be updated according to your reports if you find an issue or a missing file. Enjoy ! Download from AFK Mods I need your reports to fix the remaining bugs. Actual version : 2.5 Basically, what you have to do to find bugs is : -generating objects LOD for a given worldspace. -having the generated files properly placed in your data folder (this includes your new generated atlas that you have to move from your source folder to your data folder). -going physicaly in the worldspace in game. -waiting for daylight/good weather view conditions (or setting this in the console : fw 81a). -entering the 'tfc' command in console. -taking height and wandering with the camera, looking for oddities.
-
I noticed that the two skeletons that self reanimated at the Ritual Stone sometimes turn into ash piles, sometimes they don't. If they didn't turn into ash pile, they respawn. But once they turned into ash pile, they won't go away nor respawn after >30 days. I was rebuilding my mods from the ground up so only USLEEP was in my load order. I also have OneTweak and SKSE installed just for the borderless window mode. I hate ash pile and would like to just disable those two skeletons to not spawn in game to begin with. Is there a way to disable vanilla NPC with TES5Edit? Or would it be possible to attach some sort of clear script just to clear the ash pile out? I don't know much about script, TES5Edit would be easy enough for me. Those skeleton IDs are: 000d9652 & 000d9653 Thanks
-
Recently I posted a thread on the Bethsoft forum about phantom Steam Workshop downloads that were sometimes listing as updates for Skyrim itself. The problem has been reported elsewhere too, including the Steam Workshop forum in the Skyrim discussion section. A partial solution to the issue was raised in the 8th post of the thread. What I've since found should be a permanent solution to the issue for those who have it. In brief, the issue is being caused by a mod that you were subscribed to that has since been pulled off of the Workshop for some reason. It doesn't matter why, just that it no longer exists and the Steam client didn't properly dispose of the entry in your cache files. This is NOT the fault of the mod's author, nor is it the fault of Bethesda. This is entirely an issue caused by Valve so if anyone should get yelled at for this one it's them. Close your Steam client. You don't want to try modifying these files while it's running. Go to the Steam website using your usual web browser. Click to the Skyrim Workshop. There is a drop down menu for "Your Files", select "Subscribed Items". You'll want to be sure that any invalid items on this list are unsubscribed. To find the entry causing you problems, you need to determine the mod ID. Your subscribed mods will be listed in the following file: <Wherever you installed Steam>\steamapps\workshop\appworkshop_72850.acf Open it with any standard text editor. Mods will be listed in blocks that look like this: "87340753" { "manifest" "-1" "timeupdated" "1344126308" "timetouched" "0" "subscribedby" "<Your User Profile Number>" "ugchandle" "595851880384234733" } You will need that first number for each mod. The one in quotes by itself. So for this first entry, it would be 87340753. The URL then becomes this: http://steamcommunity.com/sharedfiles/filedetails/?id=87340753<--- Change that ID number for each mod in the list. When you get to a bad one, you'll be told the entry no longer exists, like this one: http://steamcommunity.com/sharedfiles/filedetails/?id=78419036You can plug the bad URL into Google and sometimes pull up a result for what it was. In my case, 78419036 leads back to a mod Chesko did for the 7000 Steps to High Hrothgar called The 418th Step, which he has apparently removed. With that knowledge in hand, find this block: "78419036" { "manifest" "-1" "timeupdated" "0" "timetouched" "0" "subscribedby" "<My User Profile ID>" } and remove it. Save the file. That's part of the problem solved. If you load the Steam client right now, you'll just get this entry dropped back in. You need to go one more step further and remove it from the following file: <Wherever you installed Steam>\userdata\<Your User Profile Number>\ugc\72850_subscriptions.vdf Open it with any standard text editor. You'll find an entry that looks something like this: "5" { "publishedfileid" "78419036" "time_subscribed" "1427494489" } Remove the whole block. Save the file. Load your Steam client. It should no longer be trying to download phantom Workshop entries. If you are still getting that happening, go back over the steps and check for more bad mods. You may have several that need this done. Fortunately I only had one bad one to deal with.
-
Version 1.6
53 downloads
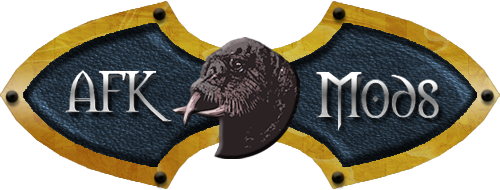
Insane Armory - Shields Description This would not be possible without NifSkope and 3ds Max Nif Plugin. Insane Armory - Shields changing "thickness" of shields by 25 or 50 percent. (depending on the options selected during installation) Does not contain any plugin (*.esp *.esm) replaces only meshes (*.nif) files. Is compatible with any modification which edits shields and replaces textures but does not change meshes. Compatibility Unofficial Skyrim Legendary Edition Patch Unofficial High Resolution Patch Dual Sheath Redux Cloaks of Skyrim Winter is Coming Installation It can be installed and uninstalled with Wrye Bash or Nexus Mod Manager at any time without any complications. Wrye Bash and Nexus Mod Manager after uninstalling restores previously replaced files. Dual Sheath Redux Users. First install Dual Sheath Redux then Insane Armory - Shields. During installation agree to replace all files. Updating Since modification contains Only Meshes it can be updated without any problems. (Remember to first uninstall older version) Uninstall Uninstal and that's it. Additional changes Fixed some meshes errors Fixed UV errors Removed some polygons that are not visible All meshes have smooth face normals Changed layout of some Meshes (Spellbreaker, Blooded Shield, Stalhrim) I tried to do everything as best I can. If you notice any mistakes, errors please let me know. Comments, suggestions, pictures appreciated. Modification is complete, and there will be no more updates. Unless, they will be found any errors or will I do some extra meshes for other modifications. Have fun. Recommended complementary modifications Insane Armory - Archery Bows and Crossbows Better Shaped Weapons - BSW by LeanWolf and masterofshadow (This modifications inspired me to create Insane Armory - Shields) My other modifications Insane Armory - Archery Bows and Crossbows Scoia'tael Bows Insane Alchemy - Potions Poisons and Others High Polygons Bottles Helm of Oreyn Bearclaw - Light Cloth Enchanting Disenchant Conan Sword Fix Change Log Credits Bethesda for creating games that can be modified. Thank you Nico coiN for allowing me to use repaired Meshes from USLEEP for Dragon Born Shield. Thank you criswolf09 for help with DSR Patch. NifSkope 2.0 by jonwd7 3ds Max Plugin 3DMAX 2016 Notepad++ 7zip -
Version 1.4
110 downloads
Insane Armory - Archery Bows and Crossbows Click image to see the whole album. Description This would not be possible without NifSkope and 3ds Max Nif Plugin. Modification changing thickness of bows and crossbows by 25 or 50 percent. (depending on the options selected during installation) Does not contain any plugin (*.esp *.esm) replaces only meshes (*.nif) files. Is compatible with any modification which edits bows and replaces textures but does not change meshes. I play Skyrim using first-person view 90 percent of time. In skyrim there is no possibility of effectively shooting and hitting target other than view from first person.(personal opinion) And just for view from first-person I created this modification. Install It can be installed and uninstalled with Wrye Bash or Nexus Mod Manager at any time without any complications. (WB and NMM after uninstalling restores previously replaced files) I tried to do everything as best I can. If you notice any mistakes, errors please let me know. Comments, suggestions, pictures, any feedback etc... greatly appreciated. Recommended complementary modifications Insane Armory - Shields Better Shaped Weapons - BSW by LeanWolf and masterofshadow (This modifications inspired me to create Insane Archery) Skyrim - Enhanced Camera XP32 Maximum Skeleton -XPMS by xp32 Belt-Fastened Quivers by Chesko and Ninivekha Work In Progress 2015-12-23 A small sample of what awaits us in the future. Arrows and Quiver Dragonbone. Click image to enlarge. >>> Also next update will include something that nobody has done for bows so far <<< Patches for: (Patches are delayed by something that nobody has done for bows so far) Skyrim Redone by T3nd0 WIP ~60% Perkus Maximus by T3nd0 WIP ~60% Longbows by Grantiz WIP ~60% Scoped Bows by OutLaw666 WIP ~40% Credits Bethesda for creating games that can be modified. Team and community AFK Mods NifSkope 3ds Max Nif Plugin 3DMAX 2012 Notepad++ Longbows by Grantiz jet4571 for help. Trueno33 for finding and reporting bug that caused disappearance of bows after dropping them. -
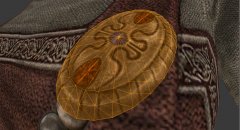
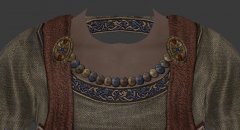
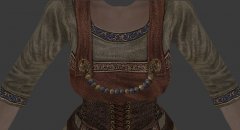
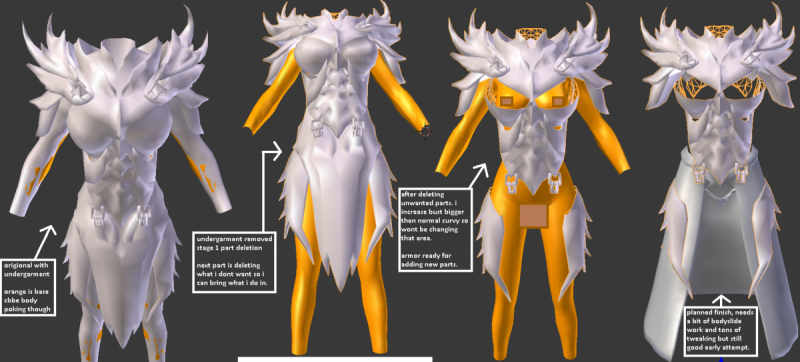
hello yall. im looking for a person to work on textures for some armor im making. armor style is primarily robe/mage bottom with armored top and arms/boots/helm (basicly im putting a robe type bottom on some armors and cutting out a good chunk of the armor, like bodysuits and leaving the main armor {bit around the groin and breast area aswell}) planning on creating some mage robes with armored parts added on like adding daedric paudrons to archmages robes etc. note dont expect much along design im still learning and im not working on it fast, and im mostly just mix and matching parts of already existing armors with as said earlier massive chunks removed. image is from my first attempt (yes i know big first step starting with endgame armor lol)
-
Nifskope problems: The textures aren't showing up once selected. How do I fix this??
-
Hello ! I got a crash I can't troubleshoot by myself in the CK. I'm trying to load a plugin heavily edited in TES5Edit, but when I try to load it after that in the CK to modify scripts-related stuffs, I got this error (in EditorWarning.txt) and the CK crash : Assert File: ..\TES Shared\ExtraData\ExtraDataList.cpp Line: 3996 Expected XWCD chunk. Any idea what it could mean ? I couldn't find anything about what an XWCD is supposed to be. I guess it should be related to either REFR or maybe CELL by its name, but the record's definition doesn't seem to include any. The Check for Errors function in xEdit doesn't see anything wrong in the plugin. I know that xEdit is truncating some records, could it be one of them ? I can provide the plugin in private if need be.
-
A simple village expansion for Ivarstead. Ivarstead always seemed like it should be more to me. There are a number of people living in the inn on a permanent basis. While the game indicates it is a village in decline due to fewer and fewer visitors coming through, it's very clear that those who are in the inn now are permanent residents to the village who have fairly strong ties they can't just cut. Since it would have been lame to throw down a bunch of empty or destroyed properties, it felt only right that 3 new houses should be built for those residents to occupy. * Temba Wide-Arm will offer to share her house if married to you. * All added houses are radiant quest enabled, so you may get Companions missions and anything else that's properly configured to use NPC homes for quests. * LOD has been generated for the area, including trees that account for the changes. * Bonus: Golldir now has a home as well and will return to it once his quest, "Ancestral Worship", is completed. He can be married at that point and you can move in with him if you wish. Check out the video by Nozi87: https://www.youtube.com/watch?v=9LjPxf9xFAc Download Locations AFK Mods Installation Requirements Official Skyrim patch 1.9.32.0.8 or greater. Installation - Wrye Bash BAIN Drop the archive into your Skyrim Mods\Bash Installers folder, then install as usual. Make sure the mod is active in the Wrye Bash mods tab. Installation - Manual Drop the Ivarstead.esp and Ivarstead.bsa files into your Data folder. Activate the mod using whatever management tool suits you. Uninstalling Due to the nature of Skyrim mods, especially those adding scripts, it is strongly discouraged to attempt uninstalling a mod from your active game. Any mod that is more than pure mesh or texture replacements has the possibility to leave behind permanent changes to your save that you may not want. This is not something modders can correct for. It is how the game was designed by Bethesda. No support will be provided for anyone who uninstalls this mod from an active game and continues on with that save. To remove the mod: Delete the Ivarstead.esp and Ivarstead.bsa from your Data folder. Then reload your game as usual. Load Order LOOT should be used for optimal placement. This mod must load after Skyrim Bridges or the navmesh changes to the north end of Ivarstead will be lost and Temba will not be able to access her home. Compatibility Fully compatible with Bring Out Your Dead. Will not be compatible with other mods that change the Ivarstead exteriors. Disclaimer This mod is not made, guaranteed, or supported by Microsoft, Zenimax, Bethesda Game Studios, or any of their affiliates.
-
[Skyrim] SKSE Diagnostics (Missing Content, Missing Masters)
Arthmoor posted a topic in Knowledge Base
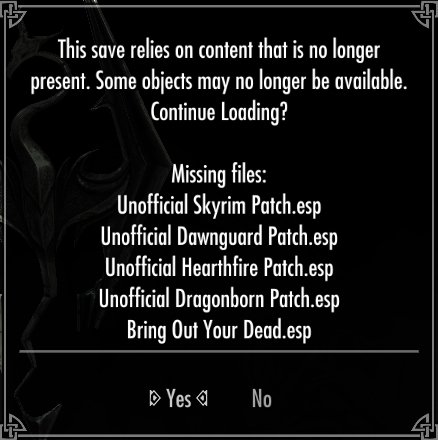
SKSE version 1.7.3 and onward support a new diagnostic function that will inform you if your load order is missing a master, and will tell you specifically which mods are missing when the game tells you it's missing content from a save. This feature hasn't been widely publicized and it's extremely useful for finding these kinds of problems for folks who refuse to touch Wrye Bash for whatever reason. In the [General] section of Data\SKSE\SKSE.ini (create the file if it doesn't exist there) you can add this: EnableDiagnostics=1 My file currently looks like this: [General] ClearInvalidRegistrations=1 EnableDiagnostics=1 [Memory] DefaultHeapInitialAllocMB=768 ScrapHeapSizeMB=256 If all you want are the diagnostics, you don't need all the other stuff. For a missing master, you'll see something like this: For a save missing content, you'll see something like this:
-
Version 1.0
44 downloads
Hey there and welcome to my mod This mod contains a badass greatsword for mages (something that was missing for ages). It's a heavily modified keening that got the "Ragna-Rok-ification treatment", means its as usual brutal as fudge. Craftable at any forge (ebony section), temperable and enchantable. You will need some empty grand soul gems and some corundum ingots to do so. Stats are slightly lowered ebony greatsword values. No overpowered stuff. Compatible with any other mod in existence. (All as usual) Could be that I put the greatsword in the Archmages quarters in the college in another update and make it uncraftable at the forge then, or make the equivalent sword and / or dagger... wasn't sure about that yet and thought "just upload it and wait for some feedback". Another idea is to set up a "change textures in-game workaround", so, you get the thingy, and if you add some fire salts to it the texture of the blade gets recolored red (also a specular / reflections change, in case you wanna put some fire enchantment on it). On another note, this thingy is a milestone for me since it's the first time I managed to make a static weapon with Blender that has got multiple parts with several shaders and reflections and even blood effects... though I removed the blood effects again after some in-game tests, crystals have a surface that would make any liquid drop / flow down directly, I tried to keep it as realistic as possible. Have some fun ********************************************************************************************************************************************************** Credits: Ragna_Rok from TESAlliance for creating this mod. All the creators of the countless Tutorials on TESA, thx for sharing and teaching your knowledge <3 The guys that made Blender, Gimp, DDS-Converter, FO3Archive, WinRar Bethesda for Skyrim and the CK ************************************************************* Permissions: NO CHANGES, NO MODIFICATIONS, NO REUPLOAD! If anyone making a new-land-mod wants to use the weapon for their mod then ask for permission to use them by contacting the author (Ragna_Rok) on tesalliance.org, usually those kind of mods get supported with most of Ragna's gear, it's mainly about keeping track on what gets used where. Just ask, I don't bite... at least most of the times. Every permission given will be stated right in the perms on the mods main release page on TESAlliance. (http://tesalliance.org/forums/index.php?/files/file/1882-crystal-greatsword/) -
So... unless you've been living in a cave or under a rock, you likely know by now that Valve and Bethesda have launched official support to allow modders to charge money for mods. What follows are my own personal opinions on the matter. I'll also set some misinformation I've seen straight. Please keep any discussion on this civil. I will report any troll posts in this thread as spammers rather than simply removing them, and IPB's anti-spam service is VERY good at what it does. I have been modding Elder Scrolls games now for going on 12 years now. I started off with Morrowind and did some tinkering around for personal use. Two of those mods eventually made it out into the public arena years later. I have numerous Oblivion mods I've made myself, and countless others I've been on project teams or contributed to in some way over the years. I also have several Skyrim mods out there now as well. So I'd like to think I've got some idea of what Elder Scrolls modding is like, and possibly some idea of what the general community thinks. Let me preface this right now, so it's clear. These are my personal opinions on the matter. They do not necessarily reflect the opinions of my employer, my colleagues on various projects, Valve, or Bethesda. With the amount of time I've invested in modding and the financial situation I've been in for awhile now, it should come as no surprise to anyone that I've been in favor of the idea of making money from mods for a good long time now. It's not something that was possible due to prior legal arrangements, but now it is, and yes, I intend to take advantage of it where possible. I don't think this makes me a bad person. It doesn't make me a greedy <insert racial slur here> as some people are saying - and yes, they're saying it. I'm not a sellout for deciding to take advantage of something I was offered the chance to do. Quite the opposite IMO. I think modders choosing to be able to get paid for their work is going to be a net positive for modding once the hate machine runs out of gas. People will begin to realize this, and indeed I've noticed some already have. People will buy what they think is worth buying. This is already happening as well. Some authors might even be able to turn this into a full time career opportunity. Publicly available data already suggests at least one person is well on their way to this after just two days of this being available. This will become a successful venture. Of this I have little doubt. People just need time to adjust to this new reality, much like many of us had to adjust to the new reality of Skyrim only being available on Steam to start with. The system is not without its problems, and I think one of the biggest ones of them all is the monetary split between Valve, Bethesda, and mod authors. It appears to be the thing the overwhelming majority of people are actually angry about. Maybe with good reason. Maybe not. For those who aren't aware, yes, modders take a 25% cut from the sale of their mods. The knee-jerk reaction has basically been "you're ripping off the modders." I'm not so sure this is the case. If you stop to think about the amount of infrastructure involved on the Workshop and Valve's staff commitment to this, their standard 30% cut doesn't look bad at all. Bethesda's 45% cut looks less equitable, but then we don't actually know how much their legal team has had to put up to clear the road for this legally. There's A LOT of stuff that we as modders simply aren't having to deal with. So 25% may not be so bad. Would I like it to be higher? Hell yes. Who wouldn't? As Gabe Newell said somewhere among one of the many threads, the distribution is up to the game developer to decide, so it's entirely possible this could change later. I for one hope it does. In short, I think this is going to be something good for the community in the end. It's a choice. Modders can choose to participate or not. Users can choose whether to buy mods or not. Let the free market do what it does best and decide this on its own. That's the only data Valve is going to go by when deciding how to proceed from here. What's not going to be good for the community is to continue ripping each other to shreds over this. The sheer volume of hate filled posts, racial slurs about Jews and money, calling people greedy assholes, and sending death threats to people only tends to make people think there never was a community if we're willing to do this to each other. Oh, and stealing the paid mods to upload them to piracy sites? Not cool. Hypocritical in fact. If we're going to protect the free ones, the paid ones deserve the same. So what do I plan to do with my own stuff? All of the mods I have published that are currently available for free on Nexus and elsewhere will remain free, now and forever. Nothing will change there. I don't think it's helpful to take existing mods, make updated versions, and lock them behind the paywall. As I'm sure we've seen, Bethesda and Valve were right when they recommended against doing this because the fans would get upset. I have one mod in the paid content section now. I believe it to be a good quality work that people will find worth the price. It has never been posted for free anywhere at any time. It was developed specifically with the paid content initiative in mind. I will decide on how to handle NEW mods on a case by case basis. Yes, I will continue to create free mods. Yes, I will also create mods I plan to make money off of. The choice exists, no reason not to use it. Now. To clear up some misinformation about all this, a Q&A type format follows. Why did they spring this on us without any kind of notice? There was notice. ~70 modders with various levels of community involvement were approached for the initiative about 6 weeks ago now and agreed to participate. So it isn't a completely unknown thing that just showed up on some random day in April. It looks that way to the vast majority of people, but as I understand it there were a lot more people asked if they were interested who either didn't respond at all or declined to participate. Why on Earth would you sign an NDA for this? We didn't. We were asked, yes ASKED, not to discuss this outside of the pre-launch group. Nobody had to promise their first born or sign away their lives or anything. Just asked not to discuss it. This is a pretty standard thing and they COULD have demanded a legally binding NDA but they didn't. I would have signed one had it been required though. For me, the opportunity was too good to let go over something like that. How could you sell out for so little money? I didn't sell out. 25% of something is better than 0% of nothing at all. Yes yes, I know, that line has been done to death already in the gaming press. That said, it was an issue we raised. Several of us in fact. I personally would rather it have been 50/50 but was asking for a 33/33/34 split as a compromise. The extra 1% leftover going to the authors. In the end, they decided to leave it as is at the current split which is 30/45/25 for Valve, Bethesda, and authors. Keep in mind, I'm broke, I need the money. So maybe they took advantage of me. Maybe they didn't. Either way, it was my choice to continue participating and I felt it was worth doing so to see where this goes eventually. It's also my choice to accept that I'm only getting 25%. You're getting hosed, they won't pay out until you hit at least $400 and it will be in Steam Wallet dollars! Folks who say this haven't even done minimal research. Valve's official FAQ already says that there needs to be a minimum of $100 in the modder's coffers to initiate a payout. Not $400. It also quite clearly says that it's real cash, not wallet bucks. We had to provide them with bank routing info to handle the payments and everything. That also includes the IRS, who are arguably the real rip off artists here since THEY do literally nothing for a cut of what the modder gets paid. There's no way I would have agreed to any of this if it had been wallet dollars. I have next to no use for those and it wouldn't help one bit with my financial situation. Why force people to buy a mod anyway? Nobody is being forced to do anything. Modders are not forced to offer content for money and users are not forced to buy it either. I'm not sure where this even entered into things since it has no basis in logic. How long before Valve shuts down Nexus? Never? Dark0ne has already addressed this in great detail over on Nexus. May as well read his statement directly. The majority is against you. This will fail. I'm not convinced. The so-called majority looks like the same set of people posting on the same forums basically going in circles restating the same arguments over and over again in each new thread that pops up somewhere. In reality, even with the 100K or so supposed modders (we have no way to verify this) who signed the change.org petition, it's a small minority of very vocal people. The majority, as usual, is sitting silent. May of them are going to be completely oblivious and have no idea anyone opposes this at all. They'll simply see a new option in the Workshop and rightly be all "oh, just like TF2 and DOTA, ok". You idiot, they own your content now. Just look what they did to Chesko. Uh, no, not quite. They don't "own" anything. Proof of that is in the 1099-MISC forms we're going to get from the IRS. It's classified as "Copyright Royalty". That's a legal thing btw. So their lawyers know full well who owns what and has the final say. We as authors can withdraw our content at any time, for any reason. Valve put one condition on that though. Anyone who has already paid for a copy will get to keep that copy. The listing will remain visible to all paying customers as well as to the author, Valve, and Bethesda. We knew this throughout the entire pre-launch discussion. This is literally no different from buying a full game from Steam and later having a publisher withdraw it from the Steam Store. This happened with Realms of Arkania and I never lost access to the game I paid for when it did. The same goes for mods on the paid Workshop. Chesko knew this going in and agreed to those conditions. Valve's lawyers were entirely in the right to tell him that they're under no obligation to remove the content unless legally compelled to do so. Which means if Chesko wants it completely removed, he'll have to sue Valve, win, and then have the court order enforced. That's not gonna happen. As far as the rest of his situation, he brought most of it on himself when he decided it would be useful to begin lighting bridges on fire. Any damage to his reputation is solely his responsibility for how he's handled things. He DID NOT deserve the death threats directed toward him or his family though. Anyone who did that should get a visit from the cops and set straight about just how serious that is. Nevermind the toxicity it brings to the community. That said, I'm also not convinced that Fore had the legal standing to bar the dependency on FNIS to get the fishing animation into the game. The Valve team even told him as much after consulting their legal people. They're far more likely to know what they're talking about than random internet posters. The animation file itself was NOT STOLEN, despite the gaming media and the community claiming otherwise. Chesko had someone develop that specifically for Art of the Catch. Oh yeah, well guess what? The EULA says this is illegal and I'm gonna tell on you! Also Bethesda owns all mods. Ignoring for one moment that Valve and Bethesda are very clearly aware of this whole thing... No. Bethesda does not own all mods. Read the EULA more carefully. Not gonna bother quoting it directly as this debate has been done to death now for years and years, but the gist of it is that Bethesda licenses the right to use your content. They cannot appropriate actual ownership of your copyright without you signing a very specific form the government has for that purpose. Mods are derivative works of the game, which is why they can dictate the terms they do. They were nice enough to let us retain ownership of our works, be they free or otherwise. Donations are a superior way to handle this. Use those instead. It's a noble sentiment to be sure. A lot of people have put forth donations as a way to combat what they see as the coming scourge. There's only one problem. Nobody donates. It could very well be that's because, until Friday, the donation buttons on Nexus may as well have been invisible. Thing is, everyone knew they existed and knew where to find them. I don't know for sure how long the system has existed, but I can count the number of donations I've received on one hand [1]. Nexus isn't the only place I've left donation links either. So that can't be the only reason. [1] Over the last 2 days, incoming donations have exploded. I very much appreciate every last one of them, but I'm going to wait and see if this is a temporary trend or a long term thing before commenting further on this.
-
Okay! So. I have no idea what I'm doing; someone on /r/skyrimmods recommended I come and make a report about an issue I'm having with the latest version of USKP. It's causing Skyrim to crash in a very weird manner; after the BGS logo, after the imperial sigil appears, but right before the gameplay controls appear (New Game, Continue, etc), Skyrim crashes to desktop. This issue is replicable, and happens when I have no other mod but SkyUI active. (I've permanently installed SkyUI via dropping its ESP into the Data folder, and I'm using Mod Organizer to handle my other mods.) System: Core i7 920 EVGA 131-GT-E767 24GB DDR3 RAM (16GB usable) EVGA nVidia GeForce GTX 980 Using ENB v0.266, PatchSpeedHack true SKSE w/ memory patch, default heap size 1024, scrap heap 256 What further information do you need from me to determine what's going on?
-
Is it safe for me to use the Unofficial Skyrim Patch and the Unofficial Dragonborn Patch without Dawnguard and Hearthfire? Are the DLC patches too dependent on each other or will Unofficial Dragonborn Patch work fine on its own?
-
Modding Workshop: My First Quest Welcome to the Modding Workshop: My First Quest. In this tutorial we will be discussing how to create a lore-friendly quest using existing NPC's and recorded dialogue and how to package it properly for upload. We will briefly discuss item creation, triggers, and scripting, but this workshop will not cover every aspect of these topics, only what is needed for this task. Coming into this tutorial, you should already be familiar with the basics of navigating the Creation Kit and some knowledge of Papyrus syntax. Part I: Tools You're going to need several tools for this job in addition to the Creation Kit. BSAopt - Allows you to view the contents and extract from Skyrim BSA and ESM files. Voice File Reference Tool - Allows you to view and search the voice files from Skyrim without needing to extract them and shows file name, dialogue, and voice type. Unfuzer CPP Edition - Allows you to decompress FUZ files from Skyrim to WAV and LIP and compress WAV and LIP files to FUZ. Wrye Bash - Takes care of most of the hoop jumping needed to get your mod packaged for release to Steam. Not necessary for other mod sites who allow uploads of loose files. TES5Edit - Shows you what files are included in your mod and how they are interacting with their respective masterfiles and/or other mods. Useful for finding mistakes and conflicts. Experimental. Clean Saves - make your own or use my resource. Probably both. You'll want saves made at key points around the area and time frame in game that you'll be modding. For example - if your quest doesn't start until after a certain event, make a clean save before and after that event. This way you will be able to test if your quest triggers properly even if a downloader installs it on a game that has already passed that checkpoint. Notepad ++ - Text documents on steroids. Infinitely helpful for scripting. It numbers lines, helps you line up indented code properly. Such nice, much syntax. Tools you should already have Skyrim - Downloaded from Steam or installed from a disc. I recommend making a shortcut to this directory. You'll be going here a lot. Creation Kit - Downloaded from Steam and installed into the same folder as Skyrim. Archive.exe - comes with the Creation Kit (I believe) and is also in the same folder as Skyrim. Used with Wrye Bash to package a mod for upload to Steam. Useful Console Commands - These are indispensable for testing a custom quest to ensure it is functioning properly since almost all of what a quest does is behind the scenes. Open the console with the tildé (~) Commands contained in <brackets> indicates a variable that must be specified. Page Up and Page Down keys can be used to scroll up or down the Console gui getstage <quest ID> - returns the current stage of the quest movetoqt <quest ID> - moves you to the location of the current target of the quest, eg. where the map marker is pointing. setstage <quest ID> <stage #> - manually sets the stage of a quest. Won't help much if the quest hasn't yet begun. sqs <quest ID> - Shows quest stages in a quest and if a stage has been achieved. sqo - Shows a human friendly list of active and completed quest objectives for currently active quests. resetquest <questid> - Sets all quest stages in a quest to 0. coc <cell ID> - teleports the player to the cell specified. player.moveto <reference ID> - teleports the player to the reference specified, eg. an NPC or unique item. Part II: Preparation Now that you have your tools there are a few things you will need know more about. Script Fragments - used by a quest to determine how it behaves, when objectives are displayed/completed, when dialogue occurs, quest completion and advancement, ect. The Creation Kit has a default prefix it attaches to all fragments. For convenience you will want to change this default to be able to tell your own script fragments apart from original ones. To do this go to File>Preferences>Scripts>Fragment File Prefix in the CK window and fill it in with something that makes it yours. Hit Apply. Use the same prefix for any files you create inside your mod! This will help you locate them in the Object Window and elsewhere. You also need an outline for your quest. Each bullet in your outline will become a Quest Stage.Quest Begin Stage 0 The quest has started but the Player has not spoken with Archmage Savos Aren Quest Objective Assigned Stage 10 The Player has spoken with Savos Aren or is the Archmage Quest Completion Stage 20 The Player completed the previous Objective and ended the quest The beginning of a quest is always invisible to the player. Without the quest having already begun quest objectives cannot be assigned. Quest dependent dialogue, items, events, and anything else included in your quest will not be enabled and quest stages cannot be advanced. Part of quest creation will be determining how your quest will start. Will it start when the game starts (Unbound)? Will the player find a long forgotten tome that leads them to your quest (Rebel's Cairn)? Will they walk into a room ( The Golden Claw)? Will it be a combination of these things (Boethiah's Calling)? Quests that start when the game starts can be a strain on someone's save game and even corrupt it over time. Reading a book requires the creation and placement of said book and making sure the player knows how to find it in your mod description. Picking up an item has similar problems. Walking into a room, however... Can be done easily. I recommend using an interior cell to minimize conflicts with other mods and finding an interior cell your player will have to pass through during normal game play in order to complete your quest. Then you need to know how many objectives there will be - ours only has one objective. You can always add more and once you know how to manage one, adding more is simple. And lastly you need to end your quest which is more complex than it sounds. More on this later. Part III: Turning on the Creation Kit You thought I'd never let you. Well, now's your chance! We're finally ready. Turn on the Creation Kit and load the Skyrim.esm only. The default settings on the Creation Kit do not allow multiple master files to run simultaneously. It is possible, but not covered here. Starting the Quest: This tutorial quest involves only locations and NPC's from the Mage's College. There's no reason for this quest to begin running silently in the background until the player is there so we will put our quest's jump start in the Hall of Elements - the first interior cell in the Mage's College the player will enter. Find it in the Cell View window under Interior World Spaces and double click it to load it in the Render Window. We want the player to activate our quest as soon as they enter the room and the easiest way to do that is with a trigger. You'll need to be able to see Triggers to do this so enable them by hitting "M" on your keyboard. Your view should be of the main entryway of the Hall of Elements. Notice the big orange box taking up the entire room. This is a trigger. We're not going to use it though, except as a nice large object to create our own trigger around. Triggers when created will appear in the render window around an object that is selected so click on the big orange box. When you do you'll notice MG06SceneTrigger will now be highlighted in the Cell View window in the loaded cell's object list. Look for the Create Trigger button on the top bar of your Creation Kit Window and click it. A new window will pop up asking you to select a form. Double click NEW and name your new trigger. VainSQTrigger = My modder prefix, what my trigger is for (Sorcerer's Quest), and that it's a trigger. A good naming convention will be vital for what we're doing due to the sheer number of almost identical things involved in a quest. Once we reach dialogue creation you'll understand more. Hit okay and a nice friendly box will appear that is your new trigger! Looks complex but the only thing you do here is add a script to it. Just like with the trigger select [New Script] and name it something sensible. Since we're adding it directly to the trigger the CK has politely filled in what our script extends already for us. From Papyrus 101 you should know basic script construction. Declare Properties at the beginning, put in your events and conditionals, end everything properly and COMPILE. Now we get to use Notepad++! This should open up your script in Notepad++. If it doesn't, you'll need to go and make Notepad++ the default editor for .psc files. The only line that should be visible is the first line. You'll have to fill in the rest. Here's a good example - Here's a rundown of what you're looking at with this script. AND SAVE! Once you have saved you can now compile it. In the main CK window there's a drop down menu for Gameplay. On it is the Papyrus Script Manager and this is where you compile. If your syntax is correct a box will pop up for a moment and then disappear. If you have any mistakes then the compiler will throw errors at you until you fix them. They are usually helpful errors such as "Missing L Paren at 31, 2" which means you forgot a left parenthesis on line 31 column 2. This will not tell you if your script does anything, it will only check to make sure that your syntax is correct. And that's all we'll do with this for now. Once our script has an actual quest to refer to we can come back and make sure the properties we set fill properly. The last bit of setup is placing the quest objective. The objective is an amulet in the Archmage's Quarters. In the Object Window under Items>Armor>AmuletsandRings find one you like the look of, duplicate it, and rename it to stick with your naming convention. Then load up the Archmage's Quarters in the Render Window and drag the amulet into the room. Edit it and select Don't Havok Settle (so it won't go flying or get shouted into a wall) and UNCHECK Respawn. What's the point of making a unique amulet you can only get with this quest if it keeps coming back? Part IV: Creating your Quest Now that everything is set up for our quest we need to actually make the quest. Go to Object Window>Character>Quest and make a new one. A huge box appears. Lots of tabs, lots of nonsense, lots of bugs. Section A: Quest Data Nothing's filled in yet, tabs are missing, and a box is check that we don't want checked! Start Game Enabled: Almost completely broken. It doesn't actually work. This is why we created a trigger a little bit ago to start the quest. Vanilla quests using this mechanic are already encoded properly which is why they work. This check box should cause the CK to generate a file to do what it says and there is a way to manually do so, but it makes packaging and updating your mod more annoying and the more loose files you have the harder it will be for players to install. Run Once: does just what it says. It means that this is not a repeatable quest (Chop Wood). We can go ahead and leave this checked. This also makes resetting the quest impossible so keep this in mind during testing. ID: The Creation Kits reference for our quest. Anything referencing a quest will use this. VainSQ Object Window Filter: determines where our quest appears in the Object Window of the CK. Leave it blank and it will be on the first page with a ton of other quests. Fill in your modder prefix to have it create a new subsection of Quests just for yours! *Note: This will not take effect until you reload your plugin. The rest of this little group of boxes and windows determines where, how, and if our quest is displayed in the quest journal. Quest Name: The name of the quest as it will appear in the player's quest list.Quests of Type "Miscellaneous" will never display their quest name and so don't need one. Quests which have no objectives also will never display their quest name anywhere and don't need a Quest Name. Priority: Determines how dialogue is assigned. All dialogue is managed by quests. You may encounter issues where dialogue won't appear during certain quests if the priority on that quest is higher than yours. Frankly, you will want your quest a lower priority than the Main Quest (10) and equal to or greater than the priority of Miscellaneous quests (60). Shouldn't matter much. Event: Since Start Game Enabled is both broken and likely to make our quest cause save data corruption we have to use either an event or a script to start it manually. A script using the Start, SetStage, or SetObjectiveDisplayed commands will do just that. Using an Event to handle the beginning involves a more complex trigger called a Story Manager Event Node. Due to the complexity and the one-trick-pony nature of SM Event Nodes we'll stick with the Script/Trigger combination. Warn on alias fill failure: Just ignore this. Allow Repeated Stages: This is how the game manages quests like Lycanthropy and Vampirism where the transformation sequences can happen over and over again. Our quest will be once and done so ignore this. Type: This is how you choose what icon is displayed next to the quest in the player's quest list. If it's set to Miscellaneous your quest will only appear and be tracked with the Miscellaneous quests. This is what we're going to do for this quest since it is tiny and has no real impact on gameplay. Recompile All Papyrus Scripts: Saves you a trip to the Papyrus Manager and does all scripts attached to your quest in one fell swoop. Use to double check that all scripts have been compiled so that their changes will take effect. And we're not even going to use any of these... Export Quest Dialogue: Export Scene Dialogue: Calculate Voice Assets: Quest Conditions: Just another reminder - leave this blank. This locks everything else in the quest to only respond to any conditions set here. Much easier to manage each part of the quest separately. Text Display Globals: Hit Okay. Be sure to hit OK and save after you finish on each tab. The Creation Kit can crash without warning! Open your quest again. More tabs have appeared! We're going to go on to the next one... Section B: Quest Stages Index: Each stage has an index number from 0 to 65535. Our quest is only three stages long so we'll create three new stages number 0, 10, and 20. Start Up Stage: When a quest begins, no matter how - stages marked with this will run as well. With Stage 0 selected, we want this to be checked. Shut Down Stage: Stages marked with this run when the quest ends. With Stage 20 selected, we want this to be checked. Keep Instance Data From Here On: This checkbox was introduced with version 1.5.24.0 of the Creation Kit. It does something complicated we won't be using. Log Entry|Conditions: This is what will appear in a player's journal entry for a quest. As the quest progresses only the most recent entry is displayed. This will not show up on a Miscellaneous quest but we will need to add entries for any stages we are going to put a script on. The only stages will will be running a script on are Stage 10 and 20. Create a New entry for each of these stages and move over to the... Papyrus Fragment/Advanced: Also referred to as Result Scripts on this tab. These scripts run when the quest stage they are linked to is called. For stage 10's log entry we want the objective for this stage to appear when this stage is called so type SetObjectiveDisplayed(10) and compile. It'll take a second or two. Move to stage 20's log entry now and give it the script SetObjectiveCompleted(10). When the quest advances to stage 20 the objective we assigned in stage 10 will now complete. Seems a bit backwards, but trust me. It all works... more or less. Once we've done that feel free to nip over to the Advanced tab and see the name of your script fragments! Now you see what the Fragment File Prefix setting does. You can rename the script from here if you like, delete it, or regenerate it. You'll also notice that while each stage is compiled separately - the same script is being used for all stages. Complete Quest: If this box is checked, that stage will trigger the "Quest Completed" message, and move the quest from the active to completed portions of the player's quest list. This doesn't stop the quest from running. With stage 20 selected we want this checked. Fail Quest: The same as Complete Quest, but triggers the "Quest Failed" message. Next Quest: Does... absolutely... nothing. Conditions: Don't touch this. These must all be met before the quest stage they are tied to will run. Section C: Quest Objectives Objective Index|Display Text: This is what will appear on screen when a script calls SetObjectiveDisplayed and what will be listed in the Journal for the objective, even for Miscellaneous quests. There is one objective in this quest so we will make a new one. Quest Objective Data: This section is where we actually fill in the details of an objective's index number and display text. Index: This is the number scripts look for to know which objective you mean. Like SetObjectiveDisplayed(10) will display whichever objective is numbered as 10. Which happens to be what we told it to do so number this objective 10. Display Text: Fill this in with something lore-friendly like Search the Archmage's Quarters and click anywhere. If the big box on top is still blank... make sure you have the empty objective selected before editing the Objective Data section and do it again. ORed With Previous: When checked, if this objective and the previous one are both displayed, they will appear in the interface as a single objective (automatically combined with an "or" in between). Also, if one of a group of ORed objectives is completed, the whole "group" of objectives will be marked complete in the interface (Blood on the Ice). I can't stand having incomplete objectives in my completed quests so... please... do it for me. Quest Targets: Each target needs an alias (quest marker) and can have a set of conditions. We will come back to this section once we deal with the Quest Aliases tab because creating one here does nothing since there are no aliases to link it to. Target Ref|Conditions: Fills from the drop down menu of Quest Target Data when you create a new one. Quest Target Data: Drop down options are created on the Quest Aliases tab. Compass Markers Ignore Locks: If your quest target happens to be in a large building like a castle or stronghold where some doors may be locked but not others checking this will make the quest marker attempt to show the player the closest door rather than the closest unlocked door. Section D: Quest Aliases A Quest Alias is pretty much how you make map markers and objective markers that guide players to quest objectives and locations. It only appears if the player is tracking the quest and in our case it will also be on the item needed to complete the objective. The item the player needs to find is the amulet we placed in the Archmage's Quarters. Here order actually matters if you have more than one alias. This tab is actually very complex. We don't actually need to know that much about it to do what we're going to do. Create a New Reference Alias (it should be obvious if you need a reference or location alias... does the alias point to an item or a cell?) in the big empty box and wait... wait for it... waaaaait for it... Welcome to the box whose bottom you shall never see. No, I don't care how big your monitor is. Alias Name: Let's call it VainSAAlias Fill Type: This section gives us six different way to fill our alias when the quest begins. Which you choose really depends on what your alias is... Specific Reference: This can be memory consuming as the alias will always be loaded even when the quest isn't running, even when the player is nowhere near the quest object. Especially if it's something like an actor. Once a quest is running, all aliases for the quest behave this way. This is also the easiest way to go and what we're going to do for our amulet. Unique Actor: Obviously an amulet isn't really an actor so we won't worry about this. If you were using an actor as an alias their reference would have to have a Persist Location - setting up an actor like this isn't outlined in this tutorial but seemed good to mention. Location Alias Reference: Pick a Location Alias from this quest (must be higher in the list than this alias), and pick a Location Ref Type. When the quest starts, the Story Manager will attempt to find a matching loc ref type from that location to fill this alias. External Alias Reference: Select another Quest, and then a Reference Alias from that quest. When this quest starts, it will fill this alias with whatever is currently in the selected alias. Note* If the selected quest isn't running, or the selected alias is empty, or if the alias reference is inside a container (including an actor's inventory), this alias will fail to fill. Create Reference to Object: When the quest starts, a reference will be created using the selected base object. The new reference can either be placed at the same location as another Reference Alias (usually a marker), or in the inventory of another Reference Alias (which must be a container of some kind). Find Matching Reference: This option allows the Story Manager to find a reference from anywhere in the world (but only persistent references, or Unique actors, can be found this way outside the loaded area). The "Match Conditions" are used by the Story Manager to filter the potential choices. This also has a bunch of other options attached to it - In Loaded Area: This limits the search to the loaded area (a player's current interior cell, or the 5x5 cells around the player in a worldspace). Useful when you want something near the player. Closest: Only available when searching "In Loaded Area", this will cause the Story Manager to prefer the closest matching reference. (Otherwise it picks randomly from all matching references.) From Event: This is only available for quests which are started from an Event through the Story Manager - we used a script instead, remember? Near Alias: Select another Reference Alias on this quest - the Story Manager will run the conditions only on any references linked to that alias's ref. Make sure that a reference linked this way has no keyword attached! We also want to have the quest advance/complete when the amulet is picked up so we can either attach a script here or to the amulet directly. It's generally tidier if you keep scripts that will only run during a quest in the quest so add a new script here, make a new one and have it look something like this - Compile, Hit OK SAVE Part V: Dialogue Dialogue Views This is possibly the most difficult part of quest creation. Half of it is broken. We're not going to do anything on this tab until the very last possible second. Note* Conversations beginning from the NPC (Having them say "Yes, what do you want?" when activated or them initiating the conversation) will require that information placed here. But again... TO THE NEXT TAB! Section A: Player Dialogue In order to create fully voiced dialogue there are no less than THREE different programs in addition to the Creation Kit needed. Voice File Reference Tool (VFRT) - Allows you to look up dialogue in an easy to navigate GUI by word or file name without extracting anything. BSAopt - Allows you to extract BSA files - in order to use any dialogue (as with any vanilla file) you should duplicate and rename it and package it as part of your mod. This is how you do that. Requires Windows Vista or later. Unfuzer CCP Edition - Allows you to decompress the FUZ files for Skyrim's vanilla dialogue into LIP and WAV files and/or recompress LIP and WAV files into a FUZ. Your new best friend. You need to know how to use each of these programs for this next section. They are not difficult to use and do just about everything all by themselves. Dialogue Branch: Groups Topics together. They allow the dialogue system to:Organize and distinguish between dialogue trees. Each Branch represents a line of the conversation. Account for the fact that the player can enter and exit dialogue at any time, providing a means for the player to reenter an interrupted conversation. An individual branch can only have one NPC speaker and can have infinite topics attached to it. A new branch is required for every different NPC speaker. On the Dialogue Views tab color for these matters. Yellow = top level. Green = blocking. Blue = normal. Topic: Holds and organizes Infos. Info: NPC dialogue lines. Say Once: Buggy. Avoid when possible. Tends to break quests. Now that we're here we need to know a little more about the voice our NPC is using. The Archmage Savos Aren uses the voice type MaleCondescending. That jerk. Using this data we can use the VFRT to go through all the lines that voice type can speak and construct a conversation from them. Like the following: The .FUZ are the file names in the Skyrim - Voices.bsa - what we will be extracting with BSAopt. Go ahead and do this now. Using Shared Dialogue is supposed to be easier, but life is pain, Highness. Anyone saying otherwise is trying to sell you something. Now that we have our very stilted and contrived conversation structure, let's creat it! Create a new branch in the Branches section. The name that pops up is the name of your quest. If you hit OK the CK will remind you that it is already in use by the editor so add Branch1 to the end of it. Hit OK and another prompt for the first topic name pops up. Feel free to shorten it but make sure to number your topic. Do not delete your branch and remake it once you have created it. Reload your plugin instead. Deleting a branch doesn't delete it. Sometimes the CK can remove deleted items from plugins... usually not. More on that later. Now you can choose your topic subtype. This dialogue isn't a Rumor or a ForceGreet package so select Custom. With your topic selected, fill in the Topic Text (our player's first line) and create a new Info in the big box on the right. If you find you have to click twice sometimes, that is because the first click is the CK running a spellcheck on what you just wrote! Big friendly box! Can't do much here yet so hit OK! Woah... new box such big much options. Topic Text: The Topic Text inherited from the Info's Topic, if any. Can't be edited from this box has to be done on the Player Dialogue tab. Prompt: If left blank, the prompt leading to this Info will be the Topic's Topic Text. If filled in, this text will be used instead. Useful if your Topic Text instead contains a summary of what is being said instead of the actual dialogue. Speaker: Choose from a drop down list the NPC speaking this line. Share Response Data From Info: Select a SharedInfo ID to acquire the response lines from that Info. This allows you to reuse the same lines in multiple places. This is why shared dialogue is easier.The Filter box, immediately above the dropdown, filters the SharedInfo IDs by the text you specify. The elipses (...), immediately to the right, will open the selected SharedInfo form. Responses: The list of Responses (individual, sequential lines) that the NPC will say. Flags: Has LIP File: Whether the game should expect a lip-data file for this line. We're going to have these since our vanilla dialogue comes with .LIP files. On Activator: Not used. Say Once: If checked, this Info can only be said once by any given Actor. As with Run Once you only want to use it his if you never want the player being able to see this ever again. Goodbye: If checked, when this Info (line of dialogue) is completed, the conversation will end. Force Subtitle: If checked, the subtitle for this line will always be displayed, regardless of the player character's distance from the speaker. DOES NOTHING! WOOO! Random: If a Random Info qualifies, it isn't said immediately. Instead, the Info is put onto a stack. If the next Info is also Random, it's put on the stack. The stack keeps building until an Info that is not marked Random is found, or an info marked Random End is found. The final Info is then added to the stack, and one of the Infos is selected randomly. Can Move While Greeting: If checked, if this Info is a Hello, the Actor can continue to move while speaking the line. Has no effect on any other line. Random End: Used to mark the end of a set of Random Infos. Technically, Random End is only necessary if the next qualifying info is also Random. However, it's good practice to end all Random Info sets with a Random End. Spends Favor Points: Not used. Favor Level: Not used. Audio Output Override: Allows you to select an Audio Output Override. The most common use of this feature is to select a different audio falloff radius (for example, SOMDialogue3D8000), which will allow the dialogue to be audible at a much larger radius than usual. Hours Until Reset: After this line is spoken, the speaker will not say it again until the specified time has elapsed. Conditions: The conditions that must be satisfied before this line will be spoken. VERY IMPORTANT! I recommend: GetStage: Dialogue triggers on a specific quest stage or even disappears when another stage triggers. GetQuestCompleted: Dialogue goes away when the quest is done or won't trigger until a quest is completed. GetIsID: Dialogue will only be spoken by this actor - you don't want every bartender to say these lines meant only for the Archmage. Copy All Conditions and Paste Conditions right click options. Save you time if you have a conversation taking place with the same conditions. Link To: The next line of dialogue that will be spoken in the conversation. When this Info is finished:If there are no Topics in this list, or none of the Topics have a valid Info, the Actor's top-level Topic List will be displayed. If one or more Topics with valid Infos in this list, a Choice List will be presented, allowing the player to select the next Info. If Invisible Continue is checked, only one Topic may be placed in this list. When this Info is finished, the next Info will begin automatically; no player prompt will be displayed. If Walk Away is checked, the dropdown becomes enabled, allowing you to select one of the Topics from the list above. If the player backs out of this Info's Choice List, the Walk Away Topic will be spoken as dialogue ends. If Walk Away Invisible in Menu is checked, the Walk Away Topic will not appear in the Choice List. Scripts: Don't worry. These will be nothing as scary as the first script, more like the little objective scripts we made. Begin Script: This script runs when the Info is played, when the Actor starts saying the line. End Script: This script runs when the Info is finished, when the Actor finishes speaking. In practice, it may take a second or two after dialogue has ended for this script to trigger. Script Add/Remove/Properties: Allows you to add, remove, or edit the properties on any Papyrus scripts attached to this Info. Here's a good example: GetOwningQuest().SetStage(10) GetOwningQuest().SetObjectiveDisplayed(10) This tells the script to look at the quest it's assigned to (scripts are very stupid, have to be told everything) and what to do. I want the last Info in this conversation to advance the quest to Stage 10 and to display the Objective on the screen for the player. We're still making the first one so let's get back to that. Set the Speak to Savos Aren and set up your conditions. Condition == 1 means it has to be true. Once you're done make a new Response which will pop up in a new box. This box looks familiar! From our conversation outline we know Savos' first response to the player will be: Let's just hope it stays this way for a long time. Uncheck Use Emotion Animation and skip down to the Audio section. If you View Valid NPCS for this voice type only Savos Aren should appear. Hit OK and then open it up again. There should now be an entry for the audio file. Record a few seconds of silence to actually generate the file and SAVE. Note the file name and path. It will be something along the lines of: Data>Sound>Voice>Mod Name.esp>Voice Type>Filename.xwm Hit OK Now remember when we made our Branch it prompted us to make the first Topic? Right click in the Topic list and make a new one for each line our player will say. Four in all. Fill in the lines for both player and Savos as we did for the first topic and record a few seconds of dialogue for each and note each file name. Now we get to go through and use the Unfuzer on those extracted .FUZ files of ours... I recommend doing this one at a time as it is easy to get mixed up moving back and forth between files and folders so much. UnFuze the .FUZ files into their .LIP and .WAV files and rename them to their corresponding files in your mod's Voice Type folder and replace them. Once they are there, reFuze them. There is a rare bug where the Skryim engine will not play back files in a different format. Best to head it off. Don't forget the script on the last Info to trigger the quest to advance to stage 10! AND SAVE! 'Cause we're going back to the Dialogue View tab... Create a new View keeping the same name convention we've been using... and right click in the big empty field next to it. Select Insert Branch into current View and the branch we created should be the only thing on the list. Make sure Current Quest Only and Current Dialogue Type Only are checked and hit OK. That's all you have to do but if you want you can drag your different Topics around and see how they all connect. Check Show All Text at the bottom if you want - this is just for the editor. Hit OK. Now go back through all of your files and double check the scripts. You'll want to make sure that all the properties have filled properly (editing them and telling it to auto-fill should fix it, if not... you may have bigger problems). Note* Not all Creation Kit errors are nonsense! If you encounter errors when loading your plugin that are specific to your plugin then follow up on them! And you are done. Save. Go quest. Also - uploading to Steam is hard. Arthmoor has saved us! Arthmoor has pretty pictures on his tutorial.Find where Wrye Bash installed, usually something along the lines of Steam>steamapps>common>Skyrim Mods>Bash Installers From there create your mod's folder including all subfolders such as meshes, voice, scripts, ect. Copy all the loose files used in your mod into their appropriate subfolder (For scripts you only need the .pex files but can include the .psc files for documentation if you so choose) Now open Wrye Bash and switch to the Installers tab where Sorcerer's Silence (or whatever you named your mod) should show up and make sure it has no errors. Anneal if it says it's not in the proper state and Install Missing if it complains it's missing files. Open Archive.exe in your Skyrim directory and click on the ellipses (...) next to the Root Dir and find the mod folder we just made in the Bash Installers folder. Select Misc, Voices, Retain Directory and File Names. When in doubt on if you need a folder, check the box. The Archive will ignore folders you don't have box check or not. Leaving the Archive.exe open switch to the Bash Installers folder and drag all your files EXCEPT for the .esp into the Archive window. Now you want to Save As using the same name as your .ESP Now you can upload the .ESP and the .BSA to the Steam Workshop through the Creation Kit


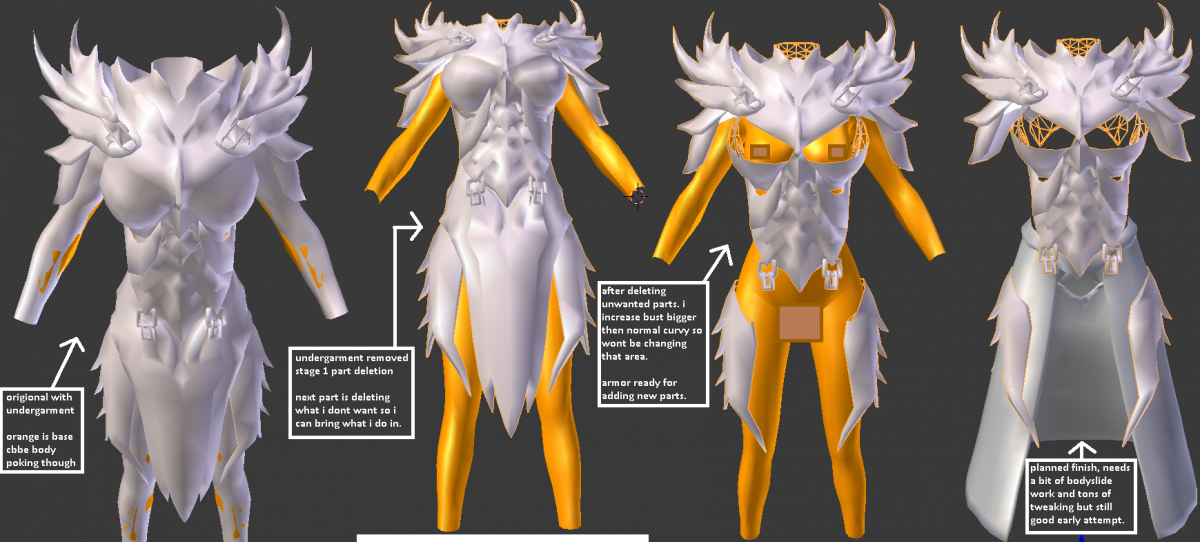

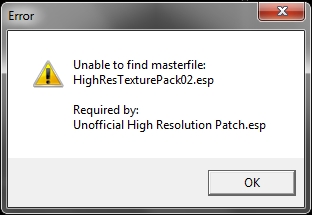
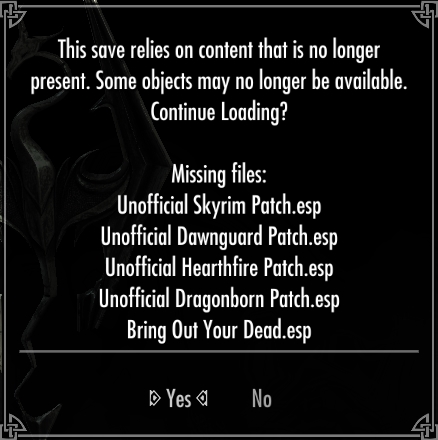


Support us on Patreon!